This chapter will discover how to divide the code into separate procedures rather than write the whole code. Using procedures will make your programs both easier to jot down and easier to check and debug. In this blog, you’ll find out how to:
-
Message broadcasting to coordinate the behavior of the many sprites
-
Message broadcasting to implement procedures
-
The “build your own block” feature of Scratch 2
-
Structured programming technique
We have created applications to date containing only one sprite, but the initial applications require multiple sprite that employment together. An animated story, for an example, may need several characters in addition to different backgrounds. Therefore, we want to know how to synchronize the sprite’s assigned jobs.
In this blog, we’ll use Scratch’s message-broadcasting mechanism to coordinate work among several sprites (this was the sole thanks to implementing procedures within the previous version of Scratch). We’ll then discuss using Scratch 2’s “custom blocks” feature to structure large programs as smaller, more manageable pieces called procedures.
A procedure could be a sequence of commands that performs a particular function. For example, we can create procedures that cause sprites to draw shapes, perform complex computations, process user input, sequence musical notes, manage games, and do many other things. Once created, these procedures can function as building blocks for constructing all styles of valuable applications.
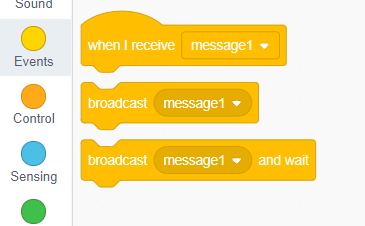
Message broadcasting and Receiving:
So how does the broadcasting system in Scratch work? Let’s take an example of the standard of living; suppose during a school there’s any activity that all the scholars and students must be available on the faculty premises. This message is for all students. Teachers in each class don’t notify and each student personally.
Rather, they will announce it for all, which means after receiving the message, every student will follow it. The identical way we will apply in our Scratch, for instance, here are several sprites during a particular animation story, and all the sprites function for one specific action. The actions will be next once they receive their corresponding message.
This broadcast triggers all scripts of all told sprites (including the broadcasting sprite itself) that begin with an identical one once I receive the trigger block. All sprites hear the printed, but they’ll only act on that if they need a corresponding once I receive the block.
Let’s build something which includes broadcasting and receiving.
Here, I’m selecting three sprites, Scratch cat, frog, and starfish. The cat is instructing all sprites to jump. Cat is saying “jump for 1 sec” and broadcasting the “jump” message, and because the sprites will receive the broadcasted message, they will perform their corresponding script.
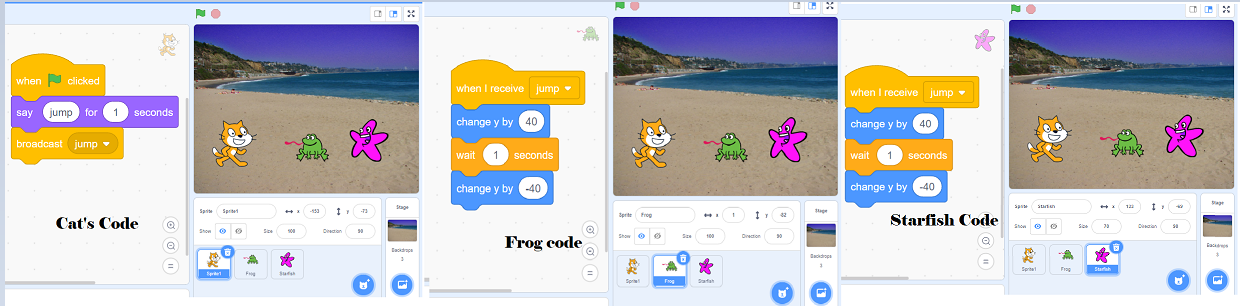
The sprites won’t start performing their actions automatically. Instead, they’ll lie only after receiving the broadcasted message.
The published and wait-for command works like the broadcast command, but it remains until all message recipients have finished executing their corresponding after receiving blocks before continuing.
Sending and Receiving Broadcasts:
To demonstrate how message broadcasting and receiving work, let’s create a straightforward application that pulls randomly colored squares. When the user clicks the left push on the Stage, the Stage will detect this event (using its when this sprite clicked block) and broadcast a message that you’ll call Square (you can choose a particular name if you want). When the sole sprite during this application receives this message, it’ll move to the present mouse position and draw a square. Follow these steps to form the application:
- Start Scratch, so select New from the File menu to start a brand-new application. Be at liberty to vary the cat’s costume to anything you prefer.
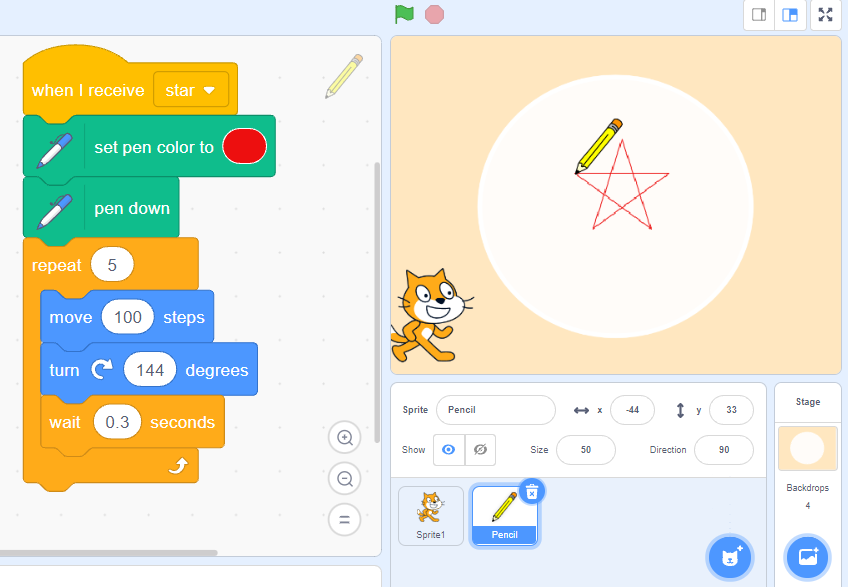
- Add the once I receive block (from the Events palette) to the Scripts Area of the sprite. Click the down arrow during this block and choose a new message from the computer menu. Within the dialog that appears, type Square and click on OK. The name of the block should change once I receive Square.
- Complete the script as shown in the image. The sprite first lifts its pen and moves to the present mouse position, indicated by the mouse x and mouse y blocks (from the Sensing palette). It then picks a random color, lowers its pen, and draws a square.
The sprite can now handle the Square message when it’s received. The script in the image will be called a message handler since its job is to process a broadcast message.
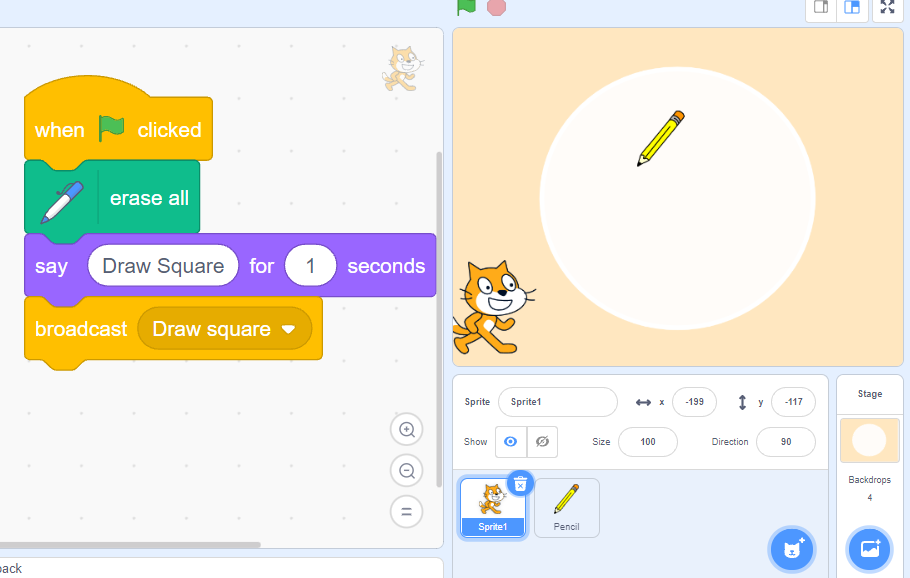
Now, let’s visit the Stage and add the code to broadcast the Square message in response to depression. First, click the Stage within the Sprite List and add the two scripts shown in the image. The primary script clears any pen marks from the Stage when clicking the green flag. The second script, triggered when the user clicks the mouse on the Stage, uses the printed block to inform the sprite that it’s time to draw.

The application is now complete. To test it, click the mouse on the Stage. It should respond by drawing a square in response to every click.
How you’ll use broadcasting in your applications? Here are some examples:
- If the sport ends while playing the game, we will create the sprite named “game end” and use it to be visible on the screen after receiving the broadcasted message.
- You’ll show the sport start, win, lose, the player lost, etc., these kinds of sprites on the screen. I am using broadcast messages.
Creating Large Programs in small Steps:
The scripts you’ve written to the current point are relatively short and easy. However, you’ll eventually write longer, more complex scripts containing many blocks, and understanding and maintaining them will become a challenge.
Structured programming was developed in the mid-1960s to simplify the method of writing, understanding, and maintaining computer programs. Instead of writing one extensive program, this approach involves dividing the program into smaller pieces, and solving one part of the task.
Consider, as an example, the method of constructing tea. The process follows instructions like
- Take a vessel and put on the gas.
- Add some water to it.
- Add tea powder and sugar in keeping with the selection.
- Then finally, add milk to it and let it boil.
- Once everything is dissolved and boiling, the tea is ready.
Similarly, after you design an answer for your programming problem, it helps to interrupt the matter down into manageable,
“mind-sized” bites.
This approach helps you maintain a transparent view of an entire program and the relationship between its parts.
Consider the following image, which shows an extended script that attracts a shape on the Stage. You’ll see that you can divide this script into smaller logical blocks by function. The primary six blocks, as an example, initialize the sprite. The primary repeat block draws a square; the second draws a triangle, etc. Next, we will group related blocks under a representative name to create procedures using the structured programming approach.
Once we write these procedures, we can call them in an exceedingly particular sequence to resolve our programming problem. The image shows separate procedures are put together to attain an identical function because of the original script. The script that uses procedures (right) is more modular and more accessible to know than the initial (left). Procedures can even facilitate you avoiding writing identical code twice. For example, if a group of commands is executed in several places in the same program, you’ll write a procedure that performs these commands and use it instead. This strategy to avoid duplicating code is stated as code reuse. Note, as an example, how the Draw square procedure was reused in the image.
Using procedures
Using Procedures enables you to use the “divide-and-conquer” strategy to resolve complex problems. First, you divide an extensive and sophisticated problem into subproblems and conquer these more specific problems individually, testing everyone in isolation. Then, after solving all the subproblems in isolation, you set these pieces together in a way that solves the initial problem. This can be just like our tea-making strategy: Our recipe divided the matter into well-defined steps, and we executed these steps in the correct order to create the ultimate product (our tea).
Now, you may ask, “How will we create these procedures?”
This section will demonstrate the old way of doing things because that’s what you’ll see in scripts created in an older version of Scratch. However, the build-your-own-block feature will be explained in the next section, and it’ll be used consistently throughout the remainder of the book. Since sprites receive their broadcast messages, we will implement procedures by having a sprite broadcast a message and perform the required task under the once I receive trigger block. Finally, we will use the published and wait for the block to confirm that our procedures are called within the correct sequence, thus adding structure and modularity to our programs. Confused? Let’s see it in action.
Creating Procedures with message Broadcasting:
We’ll explore how procedures work and how they improve your code by re-creating the square program from earlier. But, we will create a star at this point, so the Stage broadcasts a Draw star message. When it detects a mouse click, our program uses only two sprites. This makes the program smaller, making the code easier to grasp. When the sprite receives the Draw message during this application, it executes the script shown in the following image. Set the

First, I used Scratch cat to say the “Draw start” message. So it’ll broadcast the “draw star,” so the opposite sprite means the pencil will receive the broadcasted message. And it’ll follow the script written for it. As shown in the picture.
The DrawStar procedure is shown in the above image. Using procedures helps you make smaller programs easier to grasp and maintain. This can become more beneficial as you write programs to perform more complex tasks.
Building Your Block:
As of Scratch 3.0, you’ll be able also to create your block. After creating a fancy dress block, it should appear within the block palette. Where you’ll use it as you’d the other Scratch block.
My Blocks (More Blocks in Scratch 2.0) is one of the ten Scratch Block categories. It holds procedures for the chosen sprite. They’re color-coded pink. It’s empty before any blocks are created, apart from a “Make a Block” button.
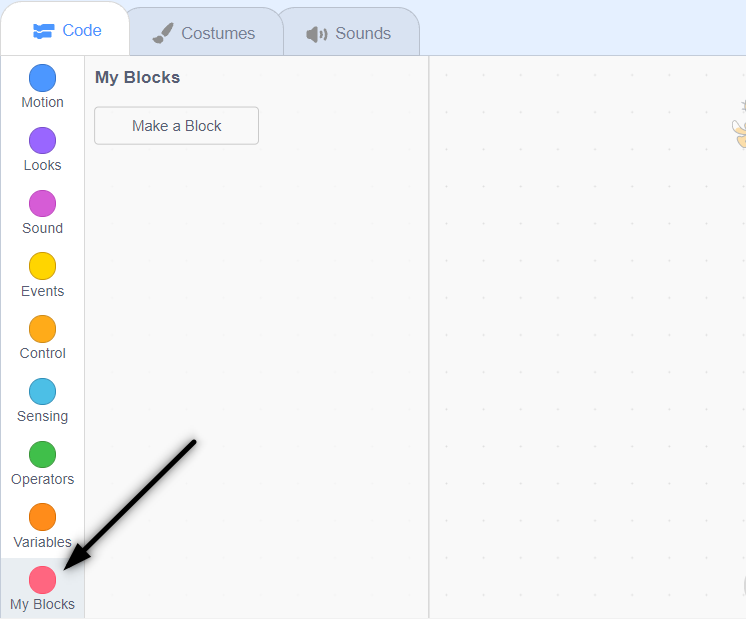
Clicking My Block creates a dialogue allowing the user to create a procedure. Ex: I’m making a block for drawing a star shape design.
- Click on my block and click on my block.
- After clicking, a window will open. Here you have got to jot down the name of your block. I’m writing StarDesign. With Pen extension.
- Hit “Ok,” and the block will reflect on your scratch screen.
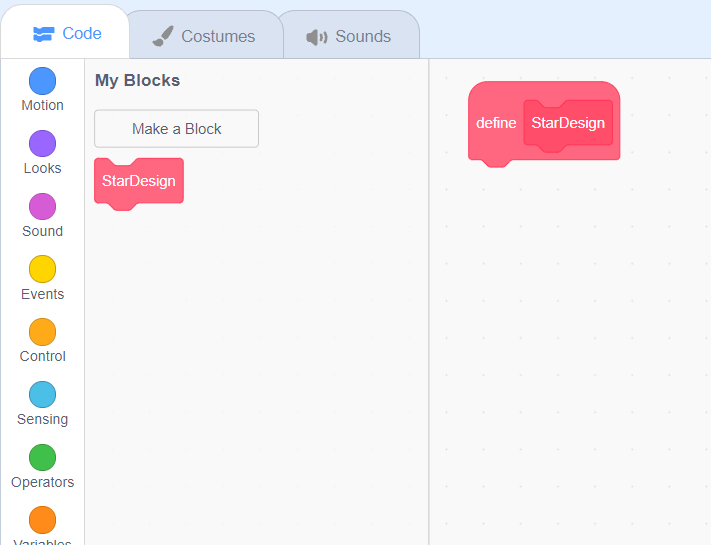
- Like this, now you’ll define your block and use it in your code anywhere.
Here, I’ve created the block now I’m defining it. As shown within the image, you’ll be able to, When the flag is clicked, star design blocks will be called, and therefore the function will climb on that block where it’s defined. And it’ll start executing.
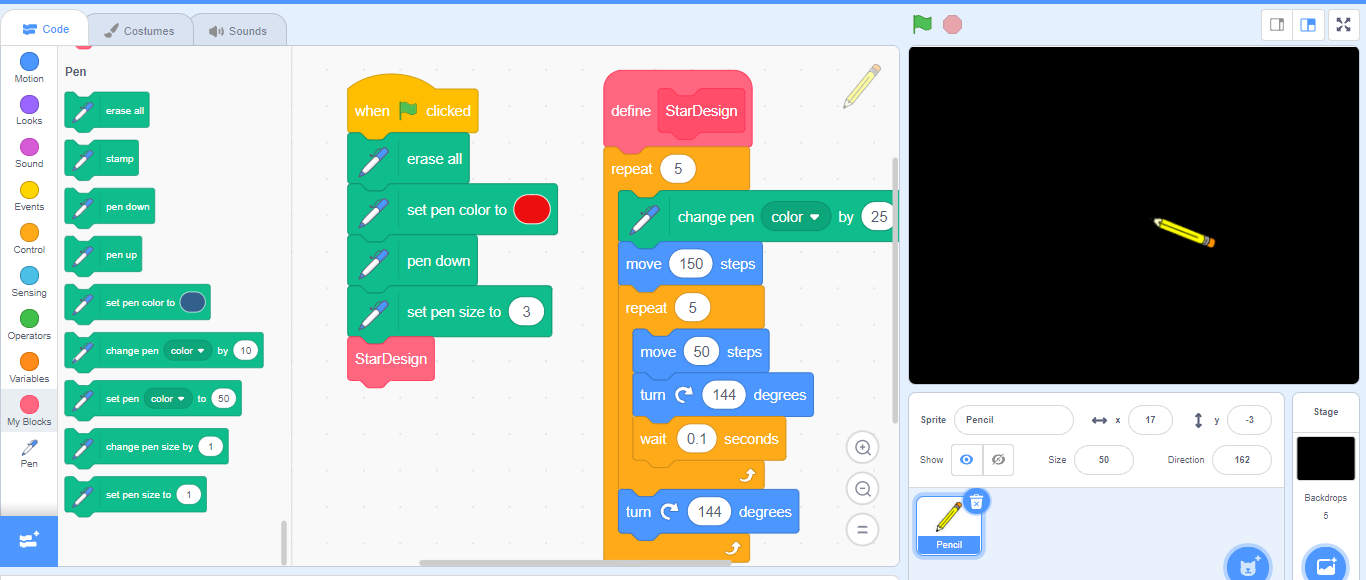
Here is the output:
You can find exciting projects on the official Scratch site.