Playing geometry dash is super exciting! So today we’re going to share how to make a geometry dash game on Scratch. In the geometry dash game, players control the movement of one character and navigate while avoiding obstacles such as spikes or collisions with blocks that instantly destroy the character. By the end of our article, you will have your very own geometry dash game made with Scratch coding.
What is a geometry dash game on Scratch?
The geometry dash game is a 2D game that involves escaping geometric-shaped obstacles via different levels that you can complete.
Playing geometry dash is pretty easy. The game can be played with a touchscreen, keyboard, mouse, or controller depending upon the platform.
The objective of the game is to complete a level by reaching its end. Press the space key to make their player jump in order to avoid obstacles. If the player crashes into an obstacle, the game will restart.
See how to code a geometry dash game on Scratch
Typically a geometry dash game will have multiple levels. But today, to keep it simple, we’re not going to add levels. Let’s get started! Head on over to the MIT Scratch website and login.
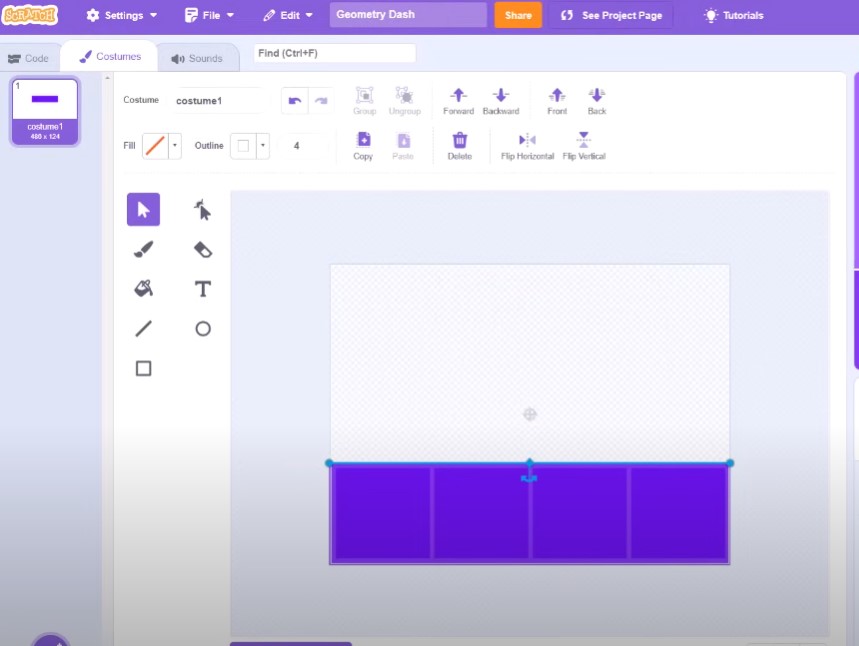
1. Choose or design a backdrop
The first thing we need to do is to create your backdrop, because by default there is a blank backdrop. To choose/design your own backdrop, click on the round mountain icon on the right side of the screen that allows you to choose your backdrop.

Go ahead and choose a backdrop. Or if you want to design your own backdrop then click on the paintbrush.
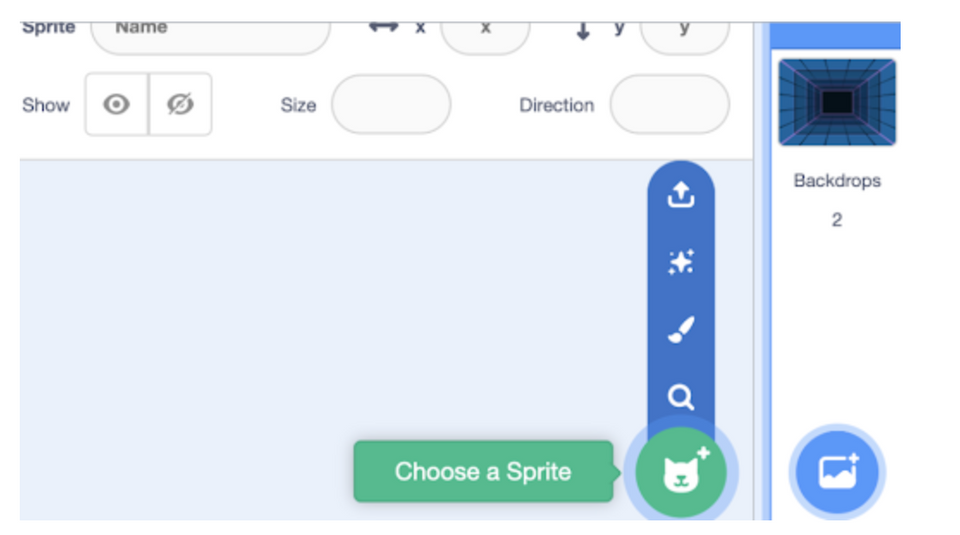
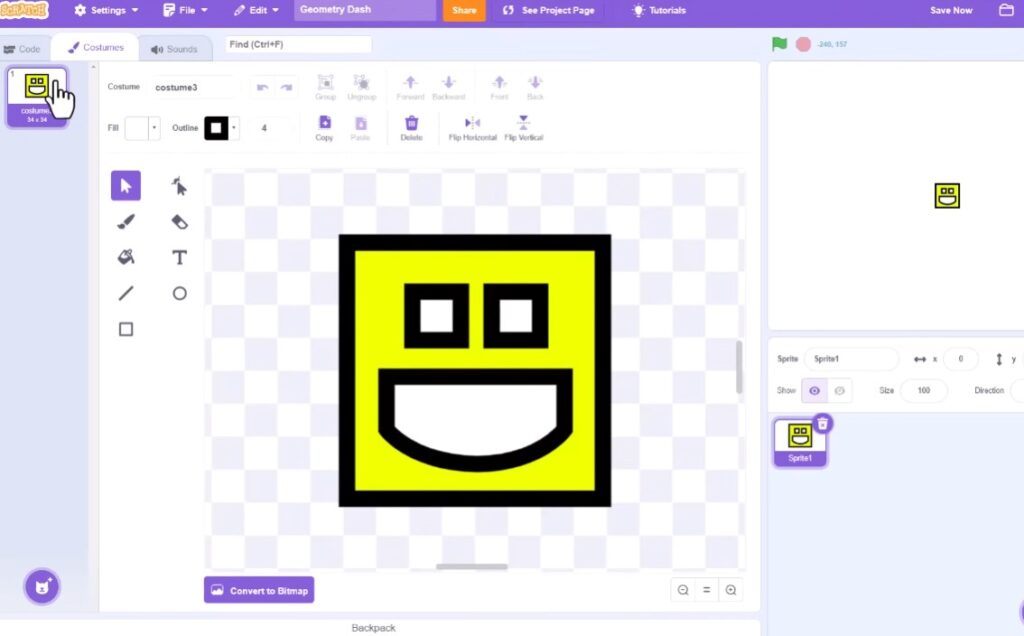
2. Design your sprite in game Geometry Dash
Now that you have your backdrops ready, we need to draw our sprites. The round blue color cat icon on the right bottom corner allows you to draw a new sprite. Go ahead and select the paintbrush option to draw your sprites.
For this game, we are drawing 2 sprites.
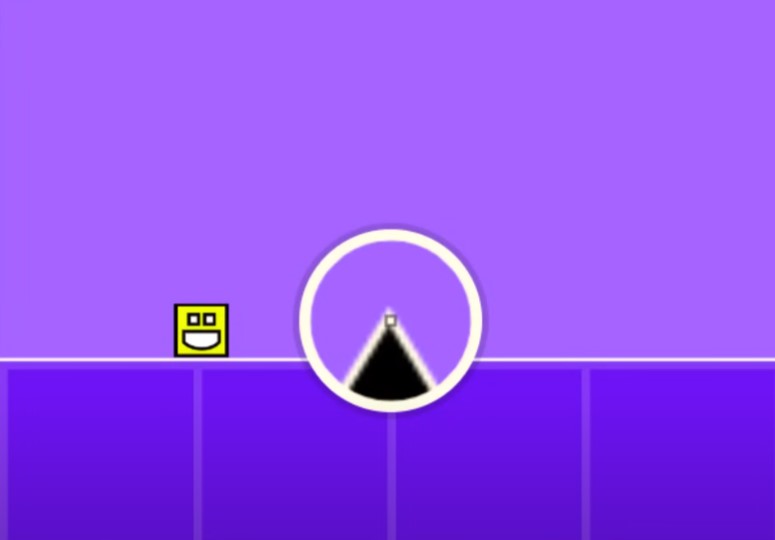
- The first sprite is a square shaped player. You can use your creativity and design your own player.
- The second sprite is triangle spikes/hurdles.
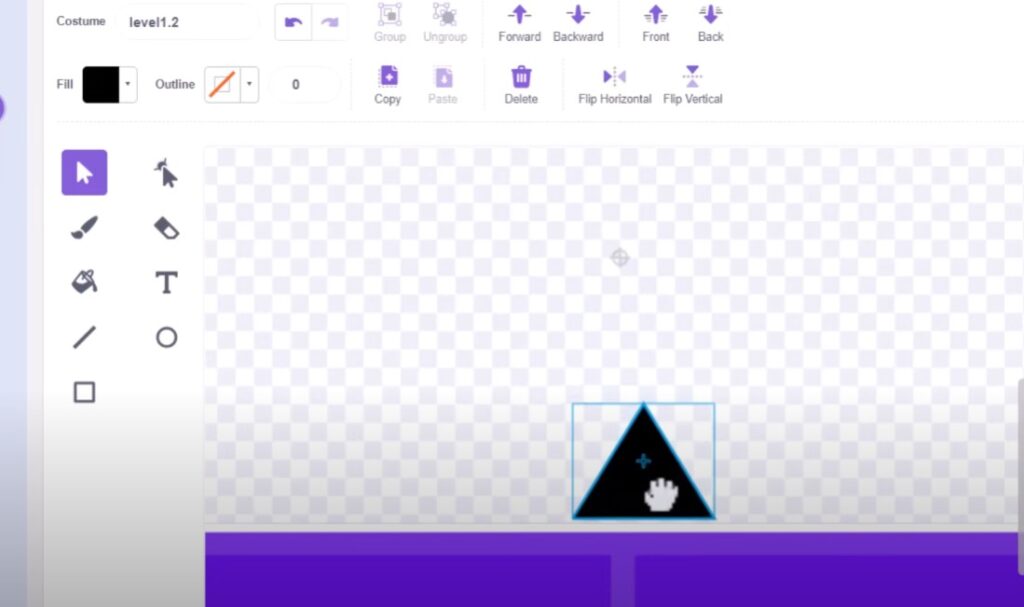
Draw 2-3 costumes for spikes as shown in the above image.
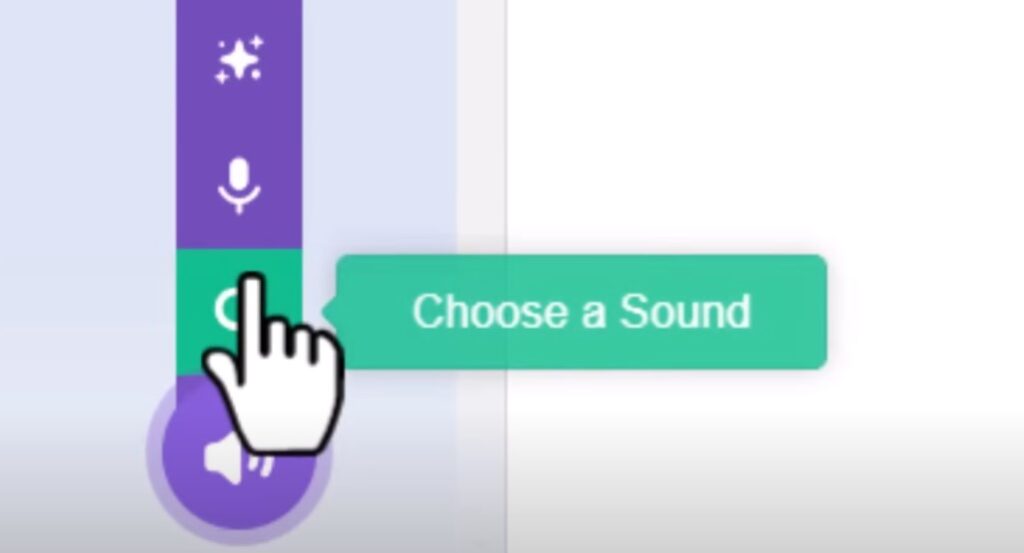
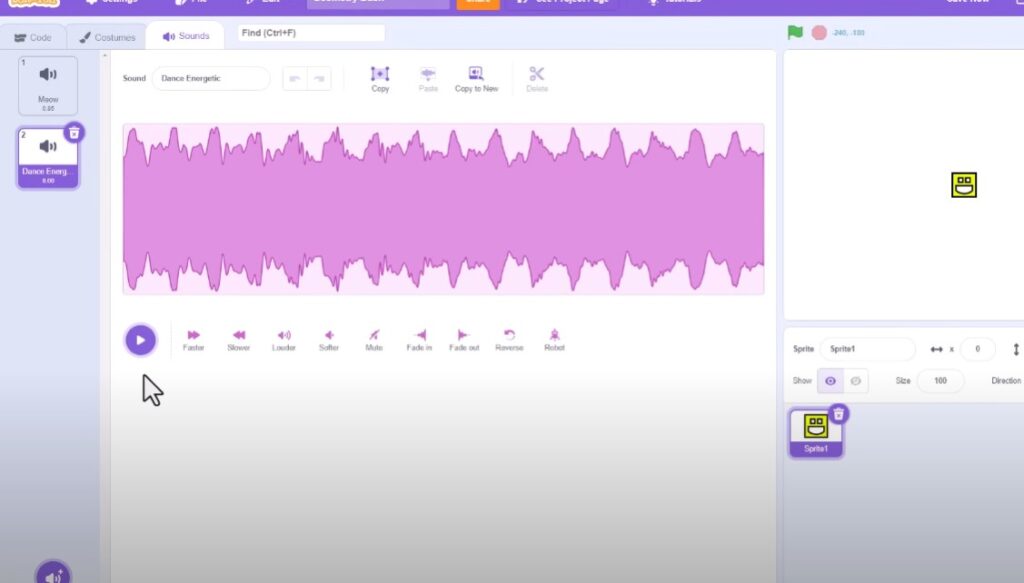
3. Add Some Music
To import unique music into Scratch for your Geometry Dash game, follow these steps. First, open another Scratch window and search for Geometry Dash music in the Scratch search bar. You’ll find numerous projects with the music you need. Next, locate your desired music track in the Scratch backpack, which is at the bottom of the screen, and drag it into your game. Remember to delete any unwanted sounds and update the play block to use the new sound. Lastly, make sure to give credit for the music by switching to the project page view and entering “Stereo Madness soundtrack by RobTop Games.” This ensures proper attribution to the creator.
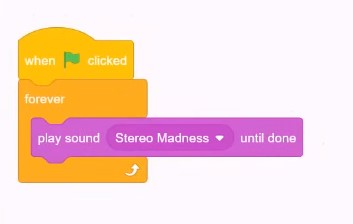
Next, let’s create a script that will play music during the game.
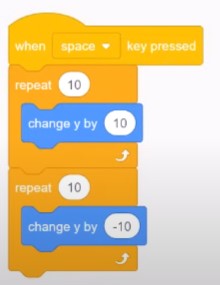
4. Code Jumping
Let’s take a look at designing a scrolling level. It’s quite exciting! Now, let’s add some basic jumping scripts. When the space key is pressed, we want the player to move up and then gradually come back down over time. To achieve this, we can use a “repeat” block. Inside the “repeat” block, we can change the player’s position on the y-axis by 10 pixels. Repeating this process 10 times will create a short animation, causing the player to move upwards. However, to make the player come back down, we need to duplicate the “repeat” script and change the “change y by” value to negative 10 (-10). This negative change in y will bring the player back down. So, in summary, we use one “repeat” block to move up (+10) and another to move down (-10).
5.Scrolling Level
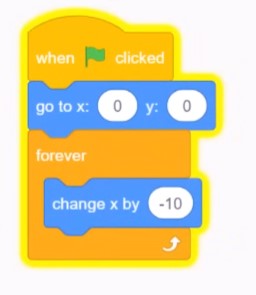
To make the platform move horizontally, we need to adjust the script. Instead of using the “forever” block for the player’s movement, we’ll move the level.
Change the “Change X by” block to “Change X by” a negative value, like -10, to make it move left.
Before the “forever” loop, add a “Go to X: 0 Y: 0” block to reset the platform’s position to the center of the screen.
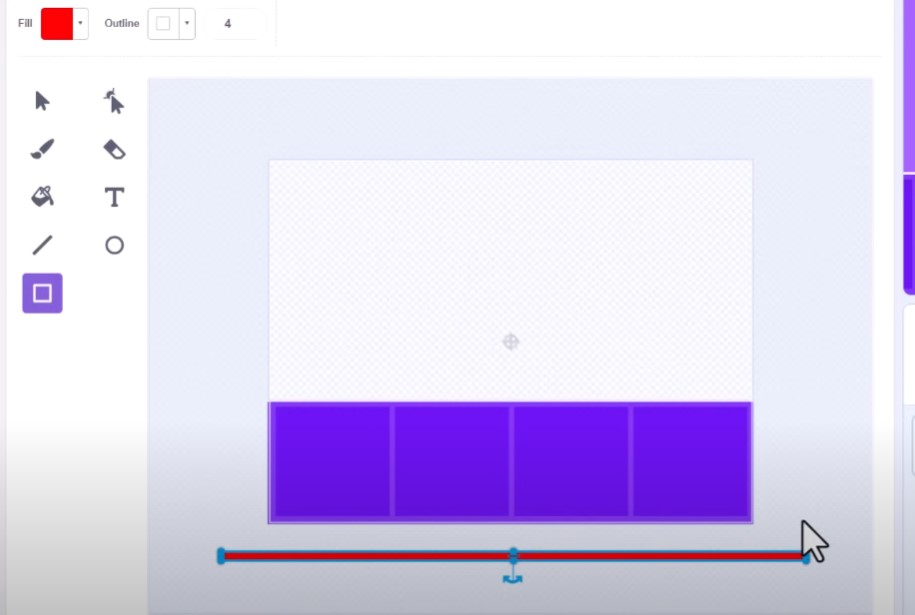
However, you might notice that the platform gets stuck on the left edge of the screen due to Sprite fencing in Scratch. To fix this, go to the costume editor and draw a long rectangle below the visible canvas area, extending off-screen but wider than the visible level, overhanging both the left and right edges. This extra width will prevent the platform from getting stuck and will allow for smooth movement left and right.
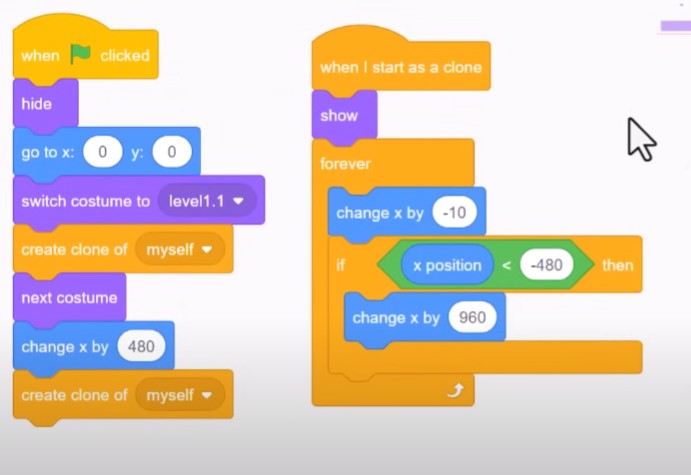
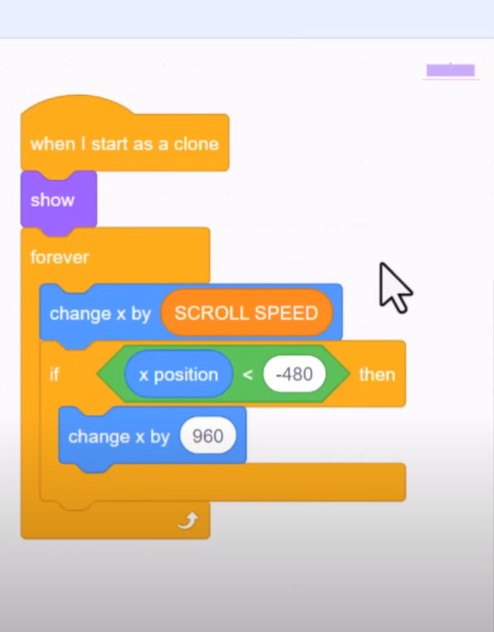
6. Clones make Scrolling Easy
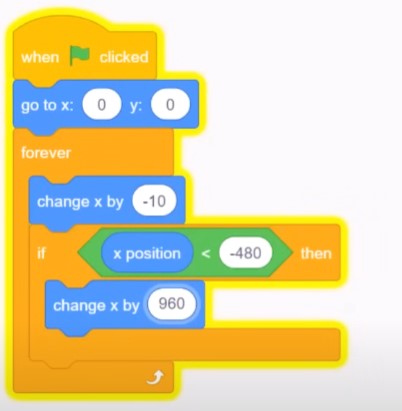
To achieve seamless scrolling in our game, we’ll focus on a single level sprite for now. Scratch’s screen width is 480 pixels, so when the sprite moves left by -480 pixels, we’ll need to shift it back to the right by twice that amount, which is 960 pixels. This will give the impression of continuous scrolling.
Here’s how we’ll do it: since we’re already scrolling left, we’ll use a conditional “if” block with a less-than comparison. If the new X position of the sprite is less than -480 pixels, we’ll move it back to the right by 960 pixels.
Now, let’s put this into action. Run the project, and you’ll see that it results in smooth scrolling. The first level sprite is in place, but we need a second one to fill the gap. Rather than creating a physical second sprite, we’ll create a clone through code to keep things simple and avoid complicating the level design and scripting.
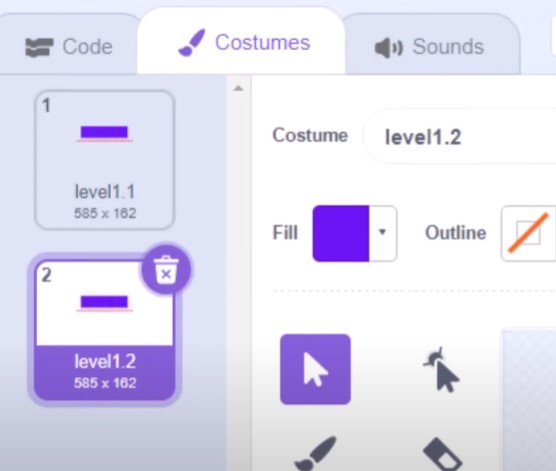
To do this, go to the costume editor and name the first costume “level 1.1,” which represents the initial level. Duplicate this costume as “level 1.2.” To distinguish between the two costumes, draw a small square on one of them. Next, separate the “forever” loop script, but keep it accessible as we’ll need it later.
Under the control category, find the “create clone of myself” block. This block will create an identical copy of the sprite. Attach it to a “when I start as a clone” hat block, and then connect them together. Now, give it a test run.
It might not look perfect at this stage, but we’ll work on refining it further.
7. Spike collisions
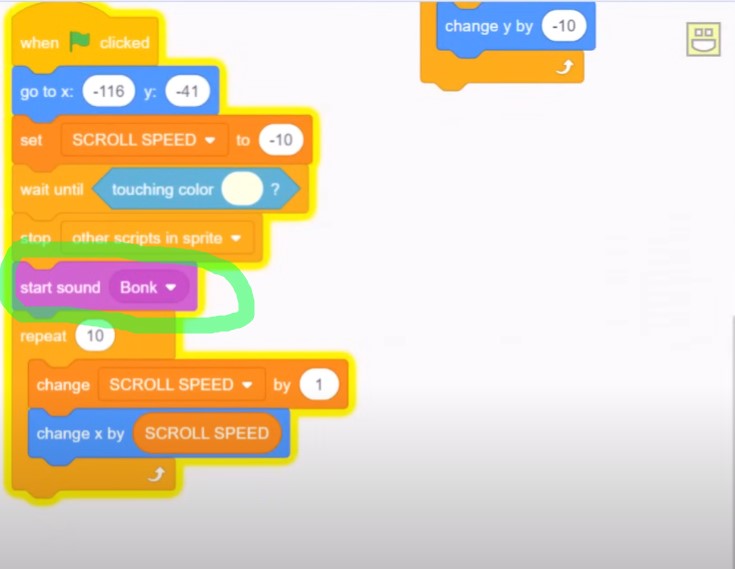
To implement spike collisions in our game, we need to make a few adjustments. First, add a “when flag clicked” hat block to initiate the collision logic. We’ll then wait until our character sprite is touching a specific color, which represents the spikes. However, if the spike is not currently visible on the stage, make sure to click back into the level sprite to make it visible and set its X position back to zero. To simplify this process for future clones, insert a “go to XY (0, 0)” block right after creating the second clone.
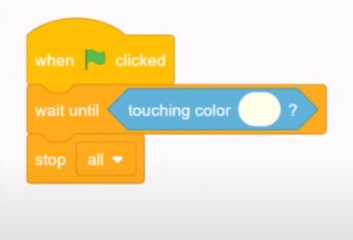
Now, back in the player sprite, let’s specify the collision color using the Color Picker, ensuring it matches the spike color. When the collision occurs, drop in a “stop all” block from the control category to indicate that the game is over. Run the project to test it. If the color matches correctly, the game ends.
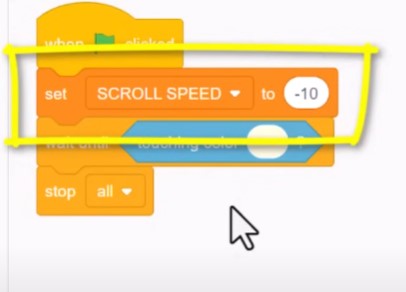
8. A Smooth Ending / Deceleration
To achieve a smoother ending and deceleration, let’s address the issue of all level clones disappearing when the Scratch project stops. Instead of ending the game abruptly, we’ll focus on stopping the level from scrolling while keeping everything else intact. We’ll introduce a “scroll speed” variable for control and set its initial value to -10 when the game begins. By using this variable, we can gradually decelerate the scrolling speed with a “repeat 10” block, reducing the “scroll speed” by one during each iteration until it reaches zero. This approach ensures a satisfying ending to the game level, with the player coming to a smooth stop after impact.

9. Collison Sound “Bonk”
I believe adding a collision sound would enhance the gaming experience. To do this, navigate to the sounds tab of the player Sprite and search for a new sound. In this case, let’s use the “Bonk” sound effect. We should start playing this sound right after stopping the other scripts and before initiating the slowed-down animation. Notice how we’ve adjusted it to start playing immediately rather than waiting for its completion. The result is a humorous yet fitting addition to the game. With this step, we’re almost wrapping up this episode, but there’s a little more to cover.
10. Much Bigger Levels with costume switching
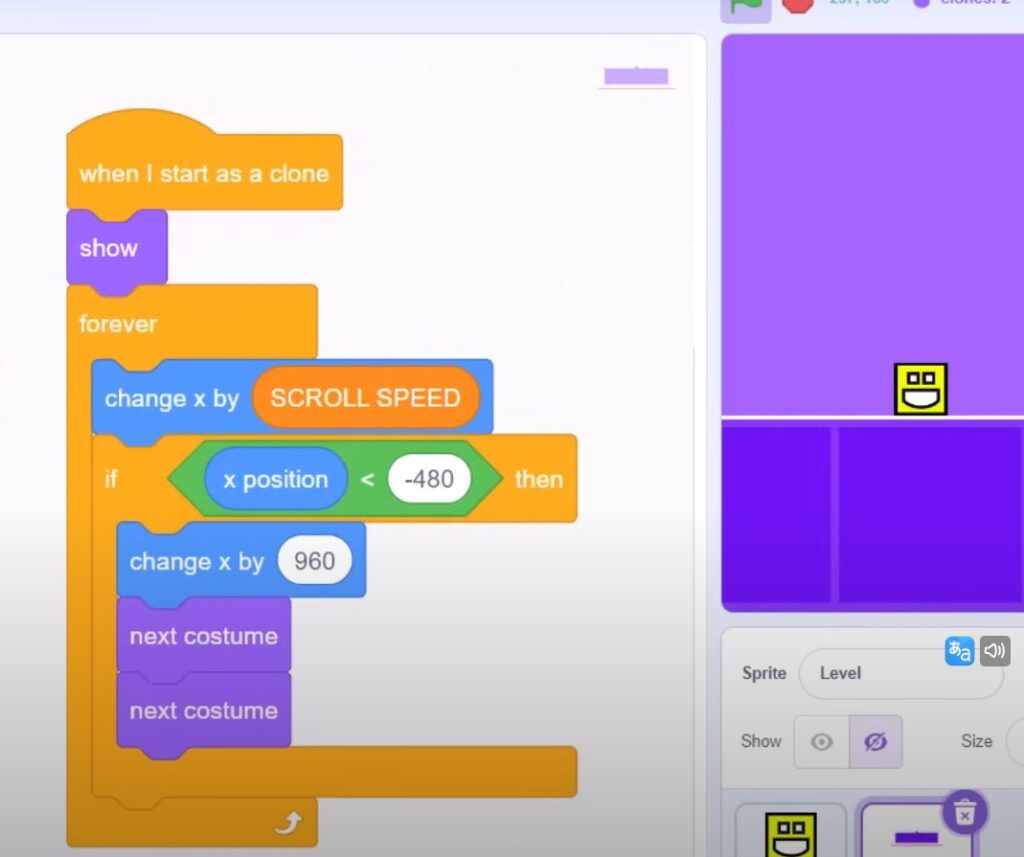
Let’s explore the potential of creating much larger and more engaging levels with costume switching. Currently, we might find our level a bit monotonous with the same spike repeating endlessly. Can we introduce new level costumes into the scrolling sequence? We experiment with one, two, and three spikes in a row, but currently, we still see only the same two costumes repeating.
The solution, however, is remarkably straightforward. As we cycle the level sprite, we can also advance it by two costumes. When working in pairs, two clone sprites can now recreate extensive and intricate level designs. We put this into action by shifting X by 960 and skipping forward by two costumes, resulting in seamless pattern repetition.
It’s an easy yet powerful technique that opens up exciting possibilities for future episodes, such as moving particles, improved player jumping with rotation, multi-level platforms, enhanced collision detection, and resolution.
Creating a Geometry Dash Game – Video Tutorial
Make a geometry dash game on Scratch
Now you’ve created a fun geometry dash game from Scratch! Play your game and see how far you can get. In this tutorial, you learned to use basic blocks to create amazing things. There is so much you can create using Scratch!
Join the Geometry Dash Game Creators Community on the official Scratch website:
🐱 Scratch Studio – https://scratch.mit.edu/studios/33730