Introduction:
Scratch is a free online platform that allows anyone to create their own games, animations, stories, and more. Scratch is designed to be easy and fun to use, especially for beginners who want to learn how to code. In this article, we will show you how to make a drawing game in Scratch, where you can draw anything you want on the screen with different colors and sizes. You can also use characters and costumes to make your drawings more interesting. Let’s get started!
Step 1: Add the Pen Extension
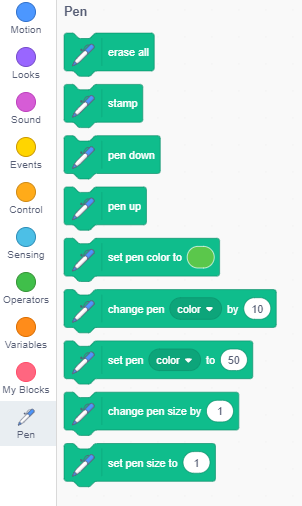
The first thing we need to do is to add the pen extension to our project. The pen extension is a set of blocks that let us draw on the stage with the pen tool. To add the pen extension, click on the blue button at the bottom left corner of the screen that says “Choose an Extension”. Then, select the pen extension from the list. You should see some new blocks in the pen category.
Step 2: Make the Sprite Draw on the Stage
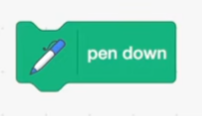
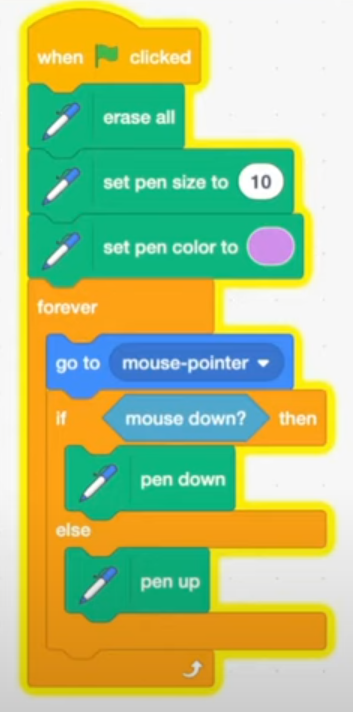
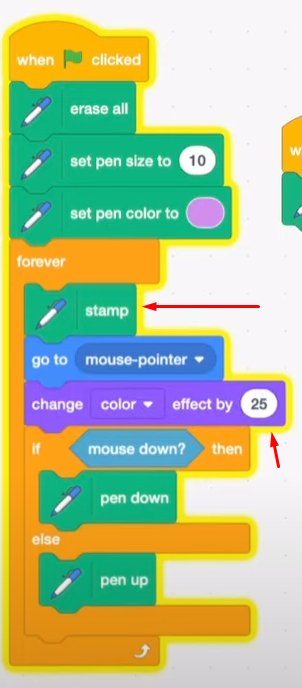
Next, we need to make our sprite draw on the stage whenever it moves. To do this, we need to use the “pen down” block, which makes the pen start drawing. We also need to use the “go to mouse pointer” block, which makes the sprite follow the mouse pointer. We can put these blocks inside a forever loop, so that the sprite is always drawing and following the mouse. We also need to add a “when green flag clicked” block, so that the code runs when we start the project.

Now, if you click the green flag and move your mouse around, you should see the sprite draw on the stage. You can also change the pen color and size by using the “set pen color to” and “set pen size to” blocks. Try different values and see what happens.
Step 3: Make the Sprite Draw Only When the Mouse is Down
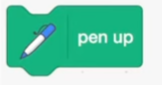
However, you may notice that the sprite is always drawing, even when you are not pressing the mouse button. This is not very realistic, because we usually want to draw only when we press the mouse button. To fix this, we need to use an “if…else” block, which lets us check a condition and do different things depending on whether the condition is true or false. In this case, we want to check if the mouse is down, and if it is, we want to put the pen down. Otherwise, we want to lift the pen up. We can use the “mouse down?” block, which is a boolean block that returns either true or false, to check the condition. We can put this block inside the “if…else” block, and then put the “pen down” and “pen up” blocks inside the appropriate slots.
Now, if you click the green flag and press the mouse button, you should see the sprite draw on the stage. If you release the mouse button, the sprite should stop drawing. This way, you can draw different shapes and lines without having to draw one continuous line.
Step 4: Make Buttons that Change the Ink Color
1.Create Button Sprites: Use the paint editor or select sprites from the library to generate buttons that represent different ink colors. In this instance, let’s opt for four buttons: red, green, blue, and yellow. Name these sprites accordingly and position them on the stage as desired.

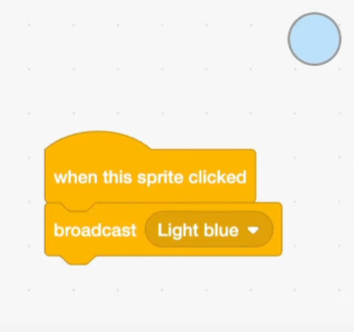
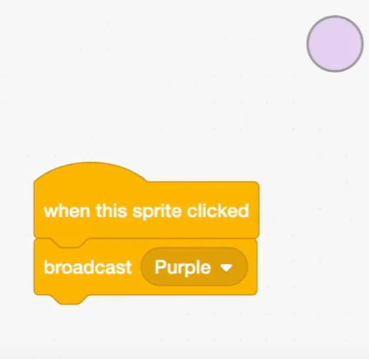
2. Code Each Button Sprite: Implement code within each button sprite to change the pen color upon clicking. Utilize the “when this sprite clicked” block to trigger actions upon clicking. Additionally, employ the “broadcast” block to send specific color messages like “red”, “green”, “blue”, and “yellow” to all project sprites. Place these blocks within the “when this sprite clicked” block and select the appropriate message from the drop-down menu.
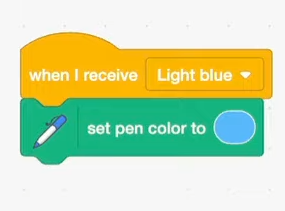
3. Modify Main Sprite Code: Enhance the main sprite’s code to respond to these messages and adjust the pen color accordingly. Utilize the “when I receive” block to execute actions upon receiving a designated message. Furthermore, incorporate the “set pen color to” block, allowing the pen color to change to the specified color. Place these blocks within the “when I receive” block and select the desired color from the color picker.
4. Repeat for Each Color Button: Ensure each color button follows this process, matching the messages and colors correctly. For instance, the green button should broadcast “green” and set the pen color to green.
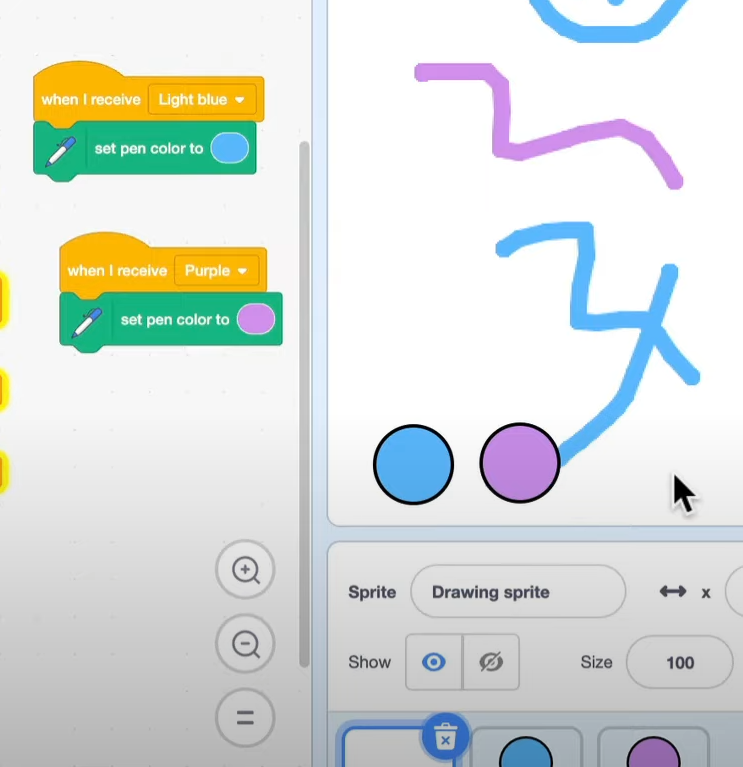
Now, upon clicking the green flag and subsequently clicking the color buttons, observe the pen color change accordingly. Enjoy drawing on the stage with the selected color palette.
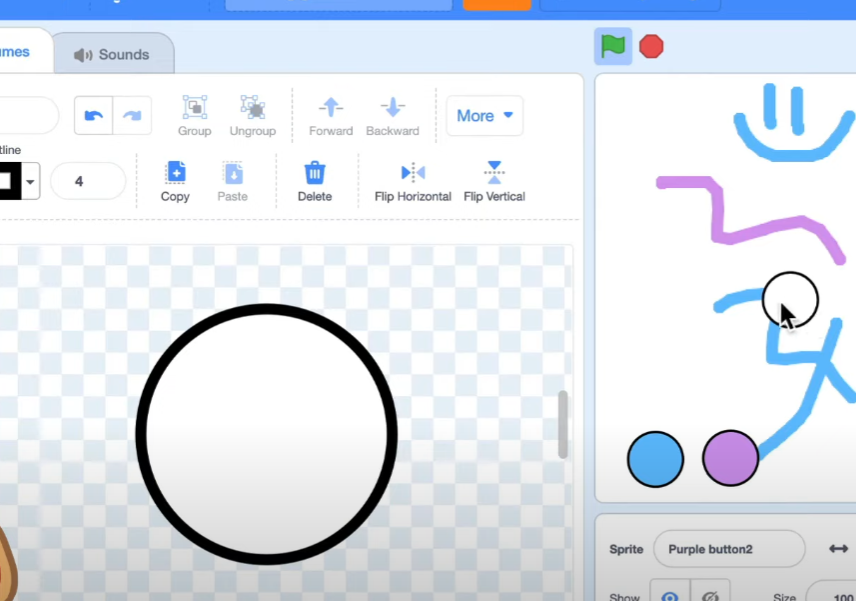
Step 5: Make an Eraser and a Clear Button
1.Create Button Sprites: Design two new sprites for the eraser and clear buttons. You can either use the paint editor to craft your buttons or select pre-made ones from the sprite library. For instance, let’s opt for a “Erase” button and a “Clear” button. Assign appropriate names to these sprites and place them on the stage where you want them positioned.
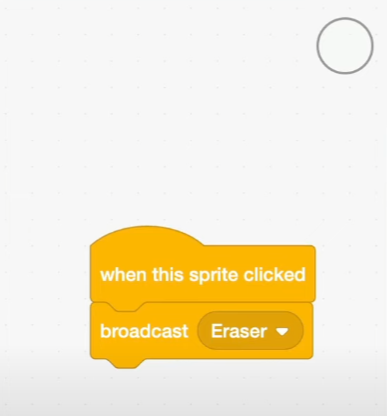
2. Code the Button Sprites: Add code to each button sprite to trigger actions upon clicking. Utilize the “when this sprite clicked” block to initiate the code upon clicking the sprite. Use the “broadcast” block to send messages to all project sprites. Each button should broadcast different messages, such as “erase” and “clear”. Place these blocks inside the “when this sprite clicked” block and select the corresponding message from the drop-down menu.
3. Code the Main Sprite: Implement code in the main sprite to receive and act on these messages. Use the “when I receive” block to run code upon receiving a specific message. For the eraser, employ the “set pen color to” block, setting it to match the background color (e.g., white in this case). You can select any color of your choice using the color picker. Place these blocks inside the “when I receive” block.

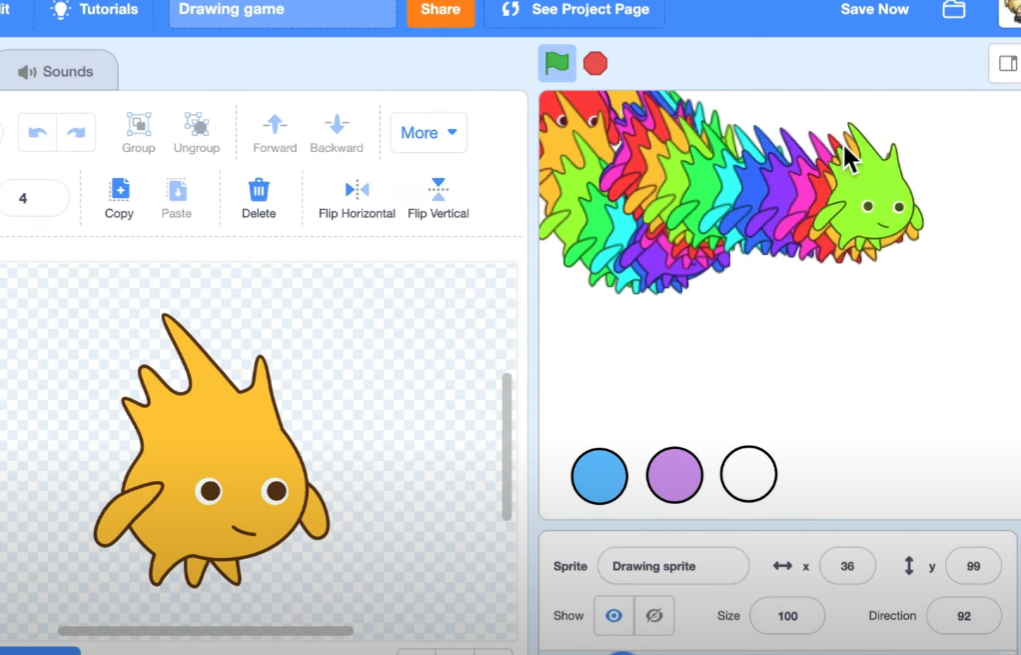
Step 6: Show How to Draw with Characters
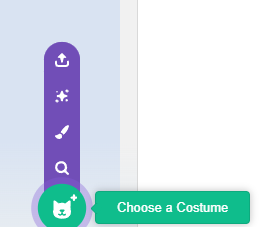
1.Costumes Selection
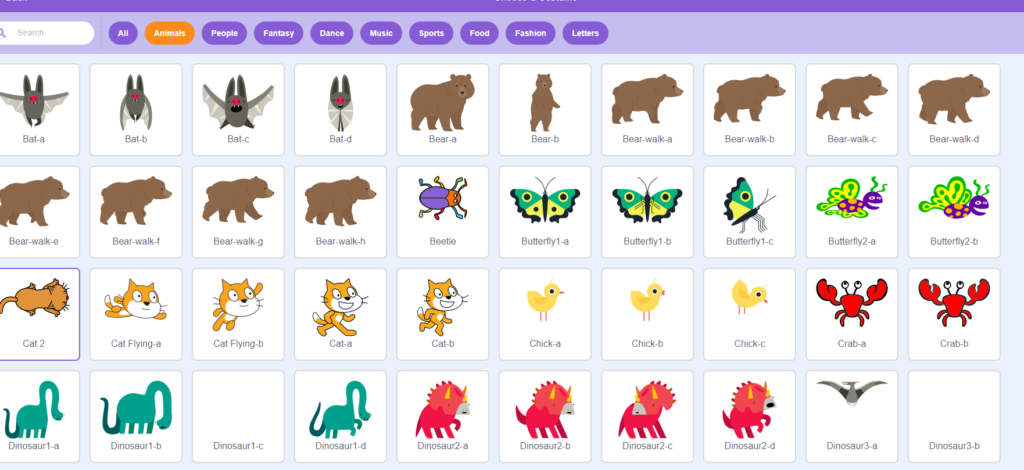
- Utilize the Costumes Tab to modify the appearance of your sprite using different characters. You have the option to either create your own using the paint editor or choose from the costume library.
- Select animal costumes like a cat, dog, panda, and penguin. Label each costume accordingly and add as many as desired.
- Apply code to the main sprite enabling it to switch between various costumes. Use the “Switch Costume To” block, altering the sprite’s costume to a specific one.
- Place this block within the “When I Receive” block and choose the appropriate costume from the dropdown menu.
3.Broadcasting Messages
- Implement code to broadcast a message whenever the sprite changes costumes. Utilize the “Broadcast” block to send messages to all sprites in the project.Use different messages for different costumes (e.g., “cat,” “dog,” “panda,” and “penguin”). Insert these blocks after the “Switch Costume To” block and choose the relevant message from the dropdown menu.
4.Color Button Functionality
- Add code to each color button sprite to respond to the messages and adjust their color correspondingly.Utilize the “When I Receive” block to activate the code when a specific message is received.Apply the “Set Color Effect To” block to modify the sprite’s color effect to a predetermined value. Place these blocks within the “When I Receive” block and choose the appropriate message and value from the dropdown menus.
5.Verification and Usage
- After clicking the green flag and selecting different costumes and color buttons, observe the sprite transitioning between various costumes and altering its color accordingly.Experiment with drawing on the stage using the characters.
Conclusion
Congratulations! You have successfully created a captivating Drawing Game in Scratch! With this game, you’re empowered to draw anything imaginable on the screen using diverse colors and sizes. Enhance your creations by incorporating characters and costumes, injecting more fun and creativity into your drawings. Elevate the game further by personalizing it with additional features like backgrounds, a save button, a stamp tool, and various other enhancements. Exploring these diverse functionalities in your Drawing Game offers an excellent Scratch programming example for beginners, showcasing how to make a game in Scratch that engages creativity and fun!
Unleash your creativity and enjoy exploring the endless possibilities!
Creating Drawing Game in Scratche: Video Tutorial
LINK TO THE SCRATCH PROJECT: https://scratch.mit.edu/projects/5173…
For more information on programming in Scratch and to explore a wide range of educational resources, please visit https://techclass4kids.com/. Dive deeper into the world of coding and unleash your creativity with TechClass4Kids!
Comments
2 responses to “How to Make a Drawing Game in Scratch: A Step-by-Step Guide”
[…] everyone! Today I want to demonstrate how to create RPG-style dialogue in Scratch. Essentially, I’ll be showing you how to design a game with branching conversations. In this […]
[…] the Scratch game in this chapter, the cat will play the part of Mario or Luigi. The player can make the cat jump […]